You might be wondering how to create a Do Ink animation. Here are some tips. To start, add an image or paper turbine to the scene. Next, add a blur effect to one or more colors. After that, export your animation as a Green Screen by Do Ink. This will give you the option of exporting your animation for use on the web. You can also add an eye blinking effect. This tutorial will teach you how to create a Do Ink animation with different effects.
How to make a shaken ink effect
How to make a shaken ink animation? This type of animation consists of a line whose width increases and decreases. You can also adjust the keyframes so that they look like a repetition drawing. To do this, use the Adjust line width tool in the Correction line subtool. Then, select the Process whole line option to process the entire line. Once the lines have been processed, click the “Shake” button to activate the effect.
How to adjust the opacity of the effect
You may be wondering how to adjust the opacity of an Animated Ink animation effect. To do so, use the Correction line subtool and set the material on top of the container to Transparent. Then, place an ink well inside the material. Adjust the opacity to suit your needs. Then, select the ink well in the ink animation effect canvas and dock it to one side of the canvas.
How to add images to a Do Ink animation
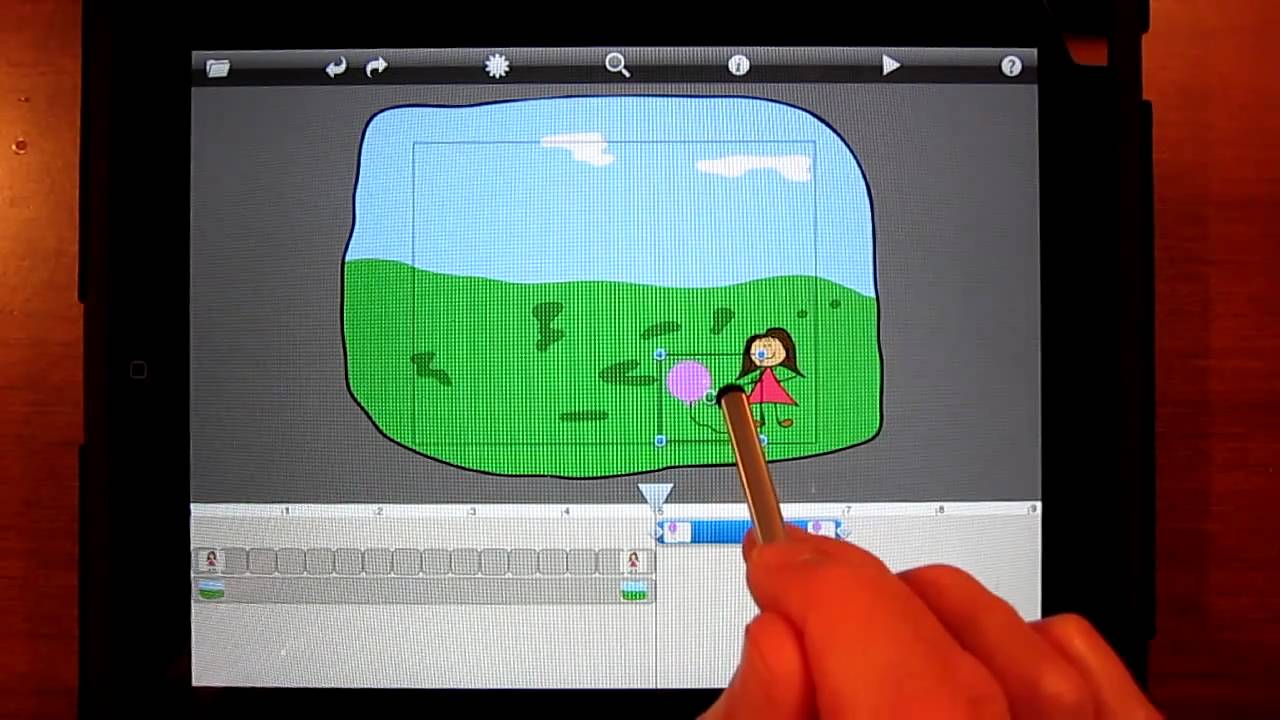
If you want to add pictures to a Do Ink animation, the first thing you need to do is connect your device to the internet. You can find the image you want in your Photo Stream, Camera Roll, or a library on your computer. Select an image and drag it to the canvas. You can also use a tutorial clip to guide you through the process. Once you have added your images, click “Edit” and choose “Add to Composition”.
Once you have the images, you can export the animation to the Green Screen. You can also export your animation to Green Screen. Once you have completed the export, you can edit it with the Green Screen and add text to it. This option is available in the export options of Do Ink presentations. You can also add background colors and transitions to the background image. Once the background is completed, you can export your Do Ink animation to a Green Screen.
How to export a Do Ink animation to Green Screen by Do Ink
If you’re wondering how to export a Do Ink animation to a green screen for use in your video, read on. This article will explain how to do just that. This simple video editing software enables you to create amazing animated movies. You can use it for all kinds of projects, including commercials, TV shows, and more. The application is easy to use and offers a wide range of advanced features, including support for cloud-based services.
Do Ink’s Green Screen app is available for both iPhones and iPads. The iPad version was once voted the best new education app on iTunes. The app offers two ways to create your animated movies – you can either import your own video or use a prerecorded one. You can also use photos or even a video of yourself to create a movie with a green backdrop. Purchasing the app is a good idea, as it comes with a video tutorial.